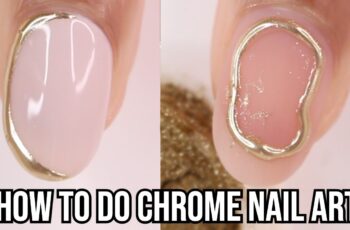
How to Paint Your Nails: DIY Nails at Home
Painting your nails at home can be a fun and rewarding experience. In this guide, we will show you how to paint your nails perfectly, ensuring a salon-quality finish every time. Whether you’re a beginner or a nail art enthusiast, these tips and tricks will help you achieve a flawless manicure.
Items Used In The Video:
- Nail clippers: (amzn.to/3XJaBlF)
- Nail Files: (amzn.to/47JWnFY) (amzn.to/3TLoMFU)
- Base Coat: (amzn.to/4egjoCT)
- Nail Polish (your choice of color) (amzn.to/3ZMuzi2)
- Top coat (amzn.to/3Bug0Wh)
- Cuticle Trimmer (amzn.to/47Z9tiV)
- Cuticle Remover: (amzn.to/3XZzbQM)
- Cuticle Pusher: (amzn.to/3TGPqzC)
- Cuticle Oil: (amzn.to/3XZzbQM)
- Nail Strengthener: (amzn.to/3Y0j7hQ)
- Makeup Sponges: (amzn.to/3zzeh1v)
Why Learn How to Paint Your Nails at Home?
Learning how to paint your nails at home has several benefits. Not only does it save you money, but it also allows you to experiment with different colors and designs at your own pace. Plus, it’s a great way to relax and practice self-care.
Step-by-Step Guide on How to Paint Your Nails
Step 1: Prepare Your Nails
The first step in how to paint your nails is to prepare them properly. Remove any old nail polish using a nail polish remover and cotton balls. Trim and file your nails to your desired shape and length. Use a buffer to smooth out the surface of your nails.
Step 2: Apply a Base Coat
Applying a base coat is crucial as it protects your nails from staining and helps the nail polish adhere better. Apply a thin layer of base coat and let it dry completely before moving on to the next step.
Step 3: Apply the Nail Polish
Now comes the fun part! Choose your favorite nail polish color and apply the first coat. Start with a thin layer, painting from the base of the nail to the tip. Allow the first coat to dry completely before applying a second coat. This ensures an even and smooth finish.
Step 4: Clean Up the Edges
To achieve a professional look, clean up any excess nail polish around the edges of your nails. Use a small brush dipped in nail polish remover to carefully remove any mistakes.
Step 5: Apply a Top Coat
A top coat is essential for sealing in your nail polish and adding a glossy finish. Apply a thin layer of top coat and let it dry completely. This will also help your manicure last longer.
Step 6: Moisturize Your Cuticles
Finish off your manicure by applying cuticle oil to moisturize and nourish your cuticles. This step not only keeps your nails healthy but also adds a polished look to your manicure.
Tips and Tricks for a Perfect DIY Manicure
- Choose the Right Tools: Investing in good quality nail tools can make a big difference in the outcome of your manicure.
- Be Patient: Allow each layer of nail polish to dry completely before applying the next one. This prevents smudging and ensures a smooth finish.
- Practice Makes Perfect: The more you practice, the better you’ll get at painting your nails. Don’t be discouraged if your first few attempts aren’t perfect.
- Experiment with Designs: Once you’re comfortable with the basics, try experimenting with different nail art designs. There are plenty of tutorials available online to inspire you.
Common Mistakes to Avoid
- Skipping the Base Coat: Always apply a base coat to protect your nails and ensure the polish adheres properly.
- Applying Thick Layers: Thin layers of nail polish dry faster and look more even. Avoid applying thick layers as they can lead to smudging.
- Neglecting Clean-Up: Cleaning up the edges of your nails is essential for a professional look. Don’t skip this step!
Conclusion
Learning how to paint your nails at home is a valuable skill that can save you time and money. With the right tools and techniques, you can achieve a salon-quality manicure from the comfort of your own home. So, gather your supplies, follow our step-by-step guide, and enjoy the process of creating beautiful nails.


