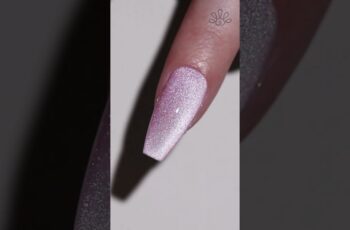
How to Do Gel X Nails At Home: Beginner Nail Art Guide
Have you ever wanted to achieve salon-style gel extensions and aesthetic Pinterest nail art at home? Today, I’ll show you how to do Gel X nails at home from the comfort of your own dwelling! We’ll also explore some easy beginner nail art designs such as French nails, blush nails, aura nails, ombre nails, and a popular fairy core summer nails design.
Products Used In This Video:
˖ Apres Light and Shadow Sheer Gel Couleur Set – Affordable Substitute – amzn.to/3zats13
˖ Apres Ombre GelX Tips (Natural Almond Short) – amzn.to/3TtOgHA
˖ Apres GelXNails Gel-X Soft Gel Nail Extensions (Natural Almond Short) – amzn.to/3ZmQ2y9
˖ Apres pH Bonder Prep & CleanseDehydrator – amzn.to/3MNq4MI
˖ Apres Acid-Free Gel Primer – amzn.to/3Tyhd5o
˖ Apres Extend Gel – amzn.to/4dfTMow
˖ Apres Omni Light – Affordable Substitute – amzn.to/3TvdZzj
˖ Apres Gel-X Prep Acid-Free Tip Primer – amzn.to/3TuAqok
˖ Apres Nail File 100/180 Grit White Crescent -Affordable Substitute – amzn.to/3XKj21s
˖ Apres Light & Shadow Sheer Gel Couleur (Catching Feelings – 406) – bit.ly/3x5EseQ
˖ Apres Light & Shadow Sheer Gel Couleur (For Once – 405) – amzn.to/3MKsWKn
˖Apres Gel Couleur Trio Set – Vintage Carnation – No4, Base Coat, Non-Wipe Top Gel Coat – amzn.to/3MKkuL5
˖ Apres Light & Shadow Sheer Gel Couleur (Lawn-ing For You – 505) – amzn.to/47we63K
˖ Apres Light & Shadow Sheer Gel Couleur (Our Holy Night – 510) – amzn.to/4doAIo9
˖ Apres Cuticle Serum (Spring Steps) – Affordable Substitute – amzn.to/4gouO99
Getting Started: How to Do Gel X Nails At Home
The first step in learning How to do Gel X nails At Home
is to gather all the necessary tools and products. You’ll need a Gel X nail kit, which typically includes nail tips, a bonder, primer, extend gel, and a UV/LED lamp. Additionally, you’ll need a nail file, buffer, cuticle pusher, and nail art tools for creating designs.
- Prep Your Nails: Start by pushing back and trimming your cuticles. File and buff your natural nails to create a smooth surface. Apply a dehydrator and primer to ensure the gel adheres properly.
- Apply the Gel X Tips: Choose the right size tips for your nails. Apply a thin layer of extend gel to the inside of the tips and press them onto your natural nails. Cure each nail under the UV/LED lamp for 30 seconds.
- Shape and Blend: Once all the tips are applied, use a nail file to shape them to your desired length and shape. Buff the surface to blend the tips seamlessly with your natural nails.
- Apply Gel Polish: Apply a base coat of gel polish and cure it under the lamp. Follow with your chosen color and cure again. Finish with a top coat and cure one last time.
Beginner Nail Art Designs: How to Do Gel X Nails At Home
Now that you have your Gel X nails applied, it’s time to get creative with some beginner nail art designs. Here are a few popular styles to try:
- French Nails: The classic French manicure is timeless and elegant. Use a white gel polish to create the tips and a nude or pink base for the rest of the nail. Cure each layer under the lamp.
- Blush Nails: Blush nails are soft and feminine. Apply a sheer pink or nude polish as the base and add a subtle blush effect using a sponge or brush. Cure each layer under the lamp.
- Aura Nails: Aura nails are trendy and eye-catching. Use a gradient technique to blend two or more colors together, creating a soft, ethereal look. Cure each layer under the lamp.
- Ombre Nails: Ombre nails are perfect for adding a pop of color. Use a sponge to blend two or more colors together, creating a seamless gradient effect. Cure each layer under the lamp.
- Fairy Core Summer Nails: Fairy core nails are whimsical and fun. Use pastel colors and add delicate designs like flowers, stars, or butterflies. Cure each layer under the lamp.
Tips for Perfecting Your Gel X Nails
To ensure your Gel X nails look professional and last as long as possible, follow these tips:
- Take Your Time: Rushing through the process can lead to mistakes. Take your time to ensure each step is done correctly.
- Use Thin Layers: Applying thin layers of gel polish will help prevent bubbling and ensure a smooth finish. Cure each layer thoroughly before applying the next.
- Keep Your Tools Clean: Clean your tools regularly to prevent contamination and ensure a flawless application.
- Practice Makes Perfect: The more you practice, the better you’ll become at applying Gel X nails and creating nail art designs.
Maintaining Your Gel X Nails At Home
Maintaining your Gel X nails is essential to keep them looking fresh and beautiful. Here are some maintenance tips:
- Moisturize Your Cuticles: Keep your cuticles hydrated by applying cuticle oil regularly. This will prevent them from drying out and keep your nails healthy.
- Avoid Harsh Chemicals: Protect your nails from harsh chemicals by wearing gloves when doing household chores. This will prevent your nail polish from chipping and keep your nails strong.
- Touch Up as Needed: If you notice any chips or wear, touch up your nails with a matching polish. This will keep your manicure looking flawless for longer.
Conclusion
Learning how to do Gel X nails at home is a fun and rewarding experience. With the right tools and techniques, you can achieve salon-quality nails at home. Experiment with different nail art designs and enjoy the process of creating beautiful, unique nails. Happy nail painting!


